In the world of desserts, cheesecake reigns supreme for its creamy texture, rich flavor, and versatile nature. Among the myriad of recipes available, the Keebler Cheesecake stands out as a beacon of simplicity and deliciousness. This article dives deep into the art of making the perfect Keebler Cheesecake, guiding you through every step with expert tips and creative twists . Whether you’re a seasoned baker or a novice eager to impress at your next gathering, this Keebler Cheesecake Recipe promises to elevate your cheesecake game. So, let’s roll up our sleeves and embark on this tasty journey together, ensuring your dessert is nothing short of divine.
Introduction to Keebler Cheesecake Recipe
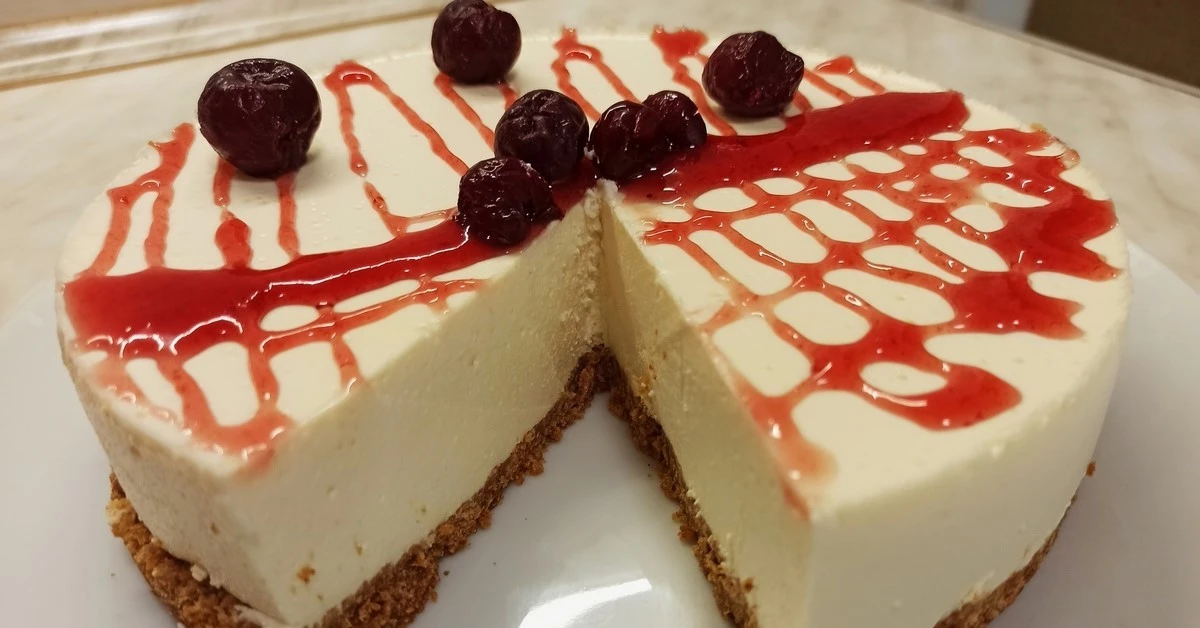
The Ultimate Keebler Cheesecake Recipe Guide
Cheesecake, oh cheesecake! It’s not just a dessert; it’s a piece of heaven on a plate. And when it comes to making a cheesecake that’s both easy to prepare and guaranteed to please, the Keebler Cheesecake recipe is your go-to. Why, you ask? Well, for starters, it uses Keebler Graham Cracker Crumbs, which offer a sweet and slightly nutty foundation that’s just irresistible.
Why Choose Keebler for Your Cheesecake?
Now, you might be wondering, “Why Keebler?” Let me tell you, it’s all about the crust. The Keebler Graham Cracker Crumbs are not just any crumbs; they’re the secret to a crust that’s perfectly crunchy yet absorbs the butter beautifully, ensuring your cheesecake has a solid base to support that creamy, dreamy filling. Plus, opting for Keebler means cutting down on prep time without skimping on flavor. It’s a win-win!
So, whether you’re in the mood for a classic dessert or looking to impress at your next dinner party, the Keebler Cheesecake is your ticket to a crowd-pleaser. Stay tuned as we walk you through the ingredients, the step-by-step recipe, and all the tips and tricks to ensure your cheesecake is the talk of the town. Let’s get baking!
Ingredients and Preparations
Gathering Your Ingredients
Before we dive into the mixing and baking, let’s talk about what you’ll need for your Keebler Cheesecake. The beauty of this recipe lies in its simplicity, but don’t let that fool you—the right ingredients are key to achieving that luxurious taste and texture we all crave in a cheesecake.
Essential Ingredients for the Perfect Crust and Filling
For the crust, you’ll need:
- 1 1/2 cups of Keebler Graham Cracker Crumbs for that sweet and slightly nutty foundation.
- 1/2 cup melted butter to bind the crumbs together and add a rich, buttery flavor.
- 1/4 cup sugar to enhance the sweetness of the crust.
Moving on to the filling, the stars of the show are:
- 3 (8 oz.) packages of Cream Cheese, softened to ensure a smooth and creamy texture.
- 1 cup sugar to balance the tanginess of the cream cheese and sour cream.
- 1 teaspoon Vanilla Extract to add a subtle depth of flavor.
- 4 large Eggs, which act as a stabilizer and emulsifier, giving the cheesecake its structure.
- 1 cup Sour Cream for that slight tang and silky texture.
Preparing Your Kitchen
Now that we’ve got our ingredients lined up, it’s time to prep our kitchen. First things first, preheat your oven to 325°F (160°C). This step is crucial for a gently baked cheesecake that’s cooked evenly throughout. Next, grab a 9-inch springform pan. This type of pan is ideal for cheesecakes due to its removable sides, making it a breeze to release your dessert masterpiece without a hitch.
Also, let’s not forget about the water bath technique. While it might sound fancy, it’s simply a method where you place your cheesecake pan in a larger pan filled with hot water. This creates a moist environment in the oven, ensuring your cheesecake bakes gently, minimizing the risk of cracks and ensuring a smooth, even texture. So, wrap the outside of your springform pan with heavy-duty aluminum foil to prevent any water from seeping in.
With your ingredients ready and your kitchen prepped, you’re all set to embark on the cheesecake-making adventure. Trust me, the effort you put in now will pay off when you’re slicing into that creamy, dreamy cheesecake. Stay tuned for the next part, where we’ll dive into the step-by-step recipe to bring this delicious dessert to life. Let’s get baking!
Keebler Cheesecake Recipe Step-by-Step
Crafting the Perfect Keebler Cheesecake
According our Keebler Cheesecake Recipe, we’re getting to the heart of the matter—the step-by-step guide to creating that sublime Keebler Cheesecake. Follow these instructions, and you’ll be well on your way to cheesecake glory.
Preparing the Graham Cracker Crust
- Mix the Crust: In a medium-sized bowl, combine 1 1/2 cups of Keebler Graham Cracker Crumbs, 1/2 cup of melted butter, and 1/4 cup of sugar. Stir them together until well incorporated. This mixture will form the base of your cheesecake, providing a delightful contrast to the creamy filling.
- Press and Bake: Transfer the crumb mixture to your 9-inch springform pan. Press the mixture firmly into the bottom of the pan to form an even layer. Then, bake in your preheated oven for 10 minutes. Remove and set aside to cool while you prepare the filling. This step ensures your crust is set and ready to support the luscious filling.
Mixing the Filling to Perfection
- Cream the Cheese: In a large mixing bowl, beat the softened cream cheese until it’s smooth and creamy. This is the foundation of your cheesecake, so make sure there are no lumps.
- Add Sugar and Vanilla: Gradually add 1 cup of sugar to the cream cheese, continuing to beat until well combined. Stir in 1 teaspoon of vanilla extract, infusing the mixture with a rich, aromatic flavor.
- Incorporate Eggs: Add the eggs, one at a time, beating well after each addition. It’s crucial to ensure each egg is fully incorporated before adding the next. This step is key to achieving that smooth, velvety texture.
- Fold in Sour Cream: Finally, fold in 1 cup of sour cream until the mixture is smooth. The sour cream adds a slight tanginess and contributes to the silky texture of the cheesecake.
Baking and Cooling: Ensuring a Smooth Texture
- Assemble: Pour the cream cheese filling over the prepared crust in the springform pan. Gently tap the pan on the counter to remove any air bubbles, which can cause cracks as the cheesecake bakes.
- Bake in Water Bath: Place the springform pan (wrapped in foil) into a larger baking pan. Fill the larger pan with hot water until it reaches halfway up the sides of the springform pan. Bake at 325°F (160°C) for 55-60 minutes, or until the edges are set but the center is still slightly jiggly.
- Cool Gradually: Turn off the oven, crack the door open, and let the cheesecake cool inside for 1 hour. This slow cooling process helps prevent cracking. Afterward, remove the cheesecake from the water bath and let it cool to room temperature on a wire rack.
- Chill: Once cooled, refrigerate the cheesecake for at least 4 hours, or overnight. This chilling time allows the cheesecake to set properly and develop its flavors.
- Serve: Run a knife around the edge of the cheesecake to loosen it from the pan before removing the springform. Slice, serve, and enjoy the fruits of your labor!
By following these steps, you’ll create a Keebler Cheesecake that’s not only a feast for the taste buds but also a sight to behold. With its creamy filling, crunchy crust, and the perfect balance of flavors, it’s sure to be a hit at any table. Stay tuned for the next part, where we’ll share expert tips to take your cheesecake from great to extraordinary.
Tips and Tricks
Expert Tips for a Flawless Cheesecake
Creating the perfect Keebler Cheesecake is an art, but with a few expert tips up your sleeve, you’re sure to impress. Let’s dive into some insider advice to elevate your cheesecake game.
The Water Bath Technique Explained
The water bath, or “bain-marie,” might seem like an extra step, but it’s the secret to a cheesecake that’s creamy through and through, without a crack in sight. The gentle heat from the water bath ensures even cooking and prevents the top from drying out and cracking. Remember, wrapping your springform pan in foil is crucial to prevent water from seeping into your cheesecake. Trust me, this step is worth the effort for that smooth, picture-perfect finish.
Preventing Cracks in Your Cheesecake
Cracks can be the bane of any cheesecake baker’s existence, but with these tips, you can say goodbye to those pesky imperfections:
- Don’t Overmix: Mixing too much air into the batter can cause it to rise and fall in the oven, leading to cracks. Mix just until each ingredient is incorporated.
- Room Temperature Ingredients: Ensure your cream cheese, eggs, and sour cream are at room temperature before mixing. This helps achieve a smooth batter that bakes more evenly.
- Avoid Overbaking: Cheesecake should still jiggle slightly in the center when it’s done. Overbaking is a common cause of cracks, as the filling continues to set as it cools.
Customizing Your Cheesecake
One of the joys of baking is making a recipe your own, and cheesecake is a perfect canvas for experimentation. Here are a few ideas to get your creative juices flowing:
- Flavor Infusions: Consider adding lemon zest, orange extract, or even a swirl of raspberry puree to your filling for a burst of flavor.
- Toppings Galore: From a simple berry compote to a decadent chocolate ganache, toppings can transform your cheesecake into a truly unique dessert.
- Crust Variations: While Keebler Graham Cracker Crumbs make for a classic crust, feel free to experiment with other cookie crumbs or even a nut-based crust for a gluten-free option.
Cheesecake making is as much about the journey as it is about the delicious destination. By embracing these tips and tricks, you’re not just baking; you’re creating memories and masterpieces. So, don your apron with confidence, knowing that each step brings you closer to unveiling a cheesecake that’s sure to dazzle and delight.
Stay tuned for our next part, where we’ll explore creative twists on the classic Keebler Cheesecake, proving that the possibilities are as limitless as your imagination. Let’s keep baking magic together!
Substitutions and Variations
Creative Twists on the Classic Keebler Cheesecake
Who says you have to stick to the script? When it comes to Keebler Cheesecake, the possibilities for customization are endless. Let’s explore some delicious substitutions and variations that can cater to different dietary needs or simply add a new twist to your dessert repertoire.
Dietary Substitutions
For those with specific dietary preferences or restrictions, fear not! You can still enjoy the rich, creamy delight of a Keebler Cheesecake with a few smart swaps:
- Cream Cheese Alternatives: If you’re looking to cut down on fat, Neufchâtel cheese is a fantastic substitute with a similar texture and flavor profile. For a dairy-free version, there are several plant-based cream cheeses on the market that work wonderfully in cheesecake.
- Sour Cream Substitutes: Greek yogurt is an excellent stand-in for sour cream, offering a similar tanginess with a lighter feel. For a dairy-free option, coconut yogurt can add a subtle tropical twist.
- Egg Replacements: For those avoiding eggs, silken tofu or a commercial egg replacer can be used. Keep in mind, the texture might be slightly different, but you’ll still achieve a deliciously creamy filling.
Flavor Variations and Add-Ins
Now, for the fun part in our Keebler Cheesecake Recipe —flavor variations and add-ins! This is where you can really let your creativity shine and tailor your cheesecake to suit any occasion or craving:
- Chocolate Dream: Mix in melted chocolate or cocoa powder with your filling for a decadent chocolate cheesecake. A swirl of chocolate ganache on top can take it over the edge.
- Fruit Fusion: Before pouring the filling into the crust, add a layer of your favorite fruit compote. Raspberry, blueberry, and strawberry are all excellent choices that add a fresh, tangy contrast to the creamy filling.
- Citrus Zest: Brighten up your cheesecake with the zest of a lemon, lime, or orange. Mix it into the filling for a subtle citrusy kick that cuts through the richness.
- Mini Cheesecakes: Use a muffin tin to make individual servings. They’re perfect for parties and allow you to experiment with multiple flavors at once. Just remember to adjust the baking time accordingly.
By embracing these substitutions and variations, you can make a Keebler Cheesecake that’s not only tailored to your tastes but also a reflection of your culinary creativity. Whether you’re accommodating dietary needs or simply in the mood to experiment, these ideas are sure to inspire a masterpiece that’s as unique as you are.
In our next part, we’ll dive into some frequently asked questions about Keebler Cheesecake, shedding light on common queries and offering solutions to ensure your baking success. Stay tuned, and let’s keep the creativity flowing in the kitchen!
Keebler Cheesecake Recipe FAQs
In the world of cheesecake making, questions abound. Whether you’re a first-timer or a seasoned baker, there’s always something new to learn. Let’s tackle some of the most frequently asked questions about making Keebler Cheesecake, ensuring your next baking adventure is as smooth as your cheesecake should be.
What are the two types of cheesecake?
There are primarily two types of cheesecake: baked and no-bake.
- Baked Cheesecake: This version requires baking in the oven and typically has a rich, creamy texture. It often includes eggs and sour cream, which help set the cheesecake as it bakes. Baked cheesecakes are known for their smooth, dense consistency and are cooled in the fridge after baking to achieve the perfect texture.
- No-Bake Cheesecake: As the name suggests, no-bake cheesecakes do not require an oven. They usually rely on gelatin or whipped cream to set and achieve a lighter, mousse-like texture. No-bake cheesecakes are chilled in the refrigerator until firm and are a great option for those who prefer a quicker, oven-free dessert.
What can I use instead of Philadelphia in cheesecake?
While Philadelphia cream cheese is a popular choice for cheesecake due to its creamy texture and consistent quality, there are several alternatives you can use:
- Neufchâtel Cheese: This cheese is similar to cream cheese but with a lower fat content. It offers a slightly grainier texture but works well in cheesecakes for those looking for a lighter option.
- Mascarpone Cheese: Known for its use in tiramisu, mascarpone is richer and creamier than American cream cheese. It can make your cheesecake denser and richer, with a velvety texture.
- Ricotta Cheese: For a cheesecake with a slightly grainy texture and a lighter, airy consistency, ricotta is an excellent choice. It’s especially popular in Italian-style cheesecakes.
Why add whipping cream to cheesecake?
Adding whipping cream to cheesecake can enhance both its texture and flavor. Whipping cream introduces more air into the batter, resulting in a lighter, fluffier texture. It also increases the creaminess and richness of the cheesecake, making it even more indulgent. The added moisture from the whipping cream can help prevent the cheesecake from drying out during the baking process, ensuring a smooth and creamy finish.
Which baking method is best for cheesecake?
The best baking method for cheesecake is often considered to be the water bath method. This technique involves placing the cheesecake pan inside a larger pan filled with hot water and then baking it. The water bath provides gentle, even heat, which helps the cheesecake cook uniformly, preventing cracks and ensuring a smooth, creamy texture. It also minimizes the risk of overbaking the edges before the center is fully set. While it may seem like an extra step, the water bath method is highly effective in achieving the perfect cheesecake consistency.
Can Keebler Ready Crust be baked?
Absolutely! While Keebler Ready Crusts are designed to be convenient for no-bake recipes, they can indeed be baked. This is particularly useful if your recipe calls for a pre-baked crust to achieve that extra crunch and depth of flavor. Just follow the recipe instructions for baking times and temperatures, and you’ll have a perfectly crispy base for your cheesecake.
What can replace graham cracker crust for cheesecake?
Graham cracker crusts are classic, but the world of crusts is vast and varied. If you’re looking to switch things up, here are a few alternatives that you can use in your Keebler Cheesecake Recipe:
- Oreo Crust: Crushed Oreo cookies (minus the filling) make for a deliciously chocolaty base.
- Digestive Biscuits: These offer a similar texture and taste to graham crackers and are a great alternative.
- Nut Crusts: For a gluten-free option, ground almonds, pecans, or walnuts mixed with butter can create a rich, flavorful crust.
- Shortbread Crust: Crushed shortbread cookies provide a buttery, crumbly alternative that pairs wonderfully with cheesecake.
What makes New York cheesecake different than regular cheesecake?
New York cheesecake is renowned for its rich, dense texture and elevated creaminess, thanks to the addition of extra cream cheese or heavy cream. It’s often baked at a high temperature initially, then finished at a lower temperature to achieve its signature smoothness. Unlike some cheesecakes that may feature a variety of flavors or add-ins, New York cheesecake typically sticks to the classic vanilla or lemon zest to enhance its rich dairy flavor.
What cream cheese is best for cheesecake?
The key to a great cheesecake is using full-fat block cream cheese for its unbeatable texture and flavor. Brands like Philadelphia are often favored by bakers for their consistent quality and creamy texture. However, any brand of full-fat block cream cheese should do the trick. Remember, the cream cheese should be at room temperature to ensure a smooth, lump-free batter.
With these FAQs addressed, you’re better equipped to tackle your Keebler Cheesecake with confidence. Remember, baking is as much about the process as it is about the delicious results. So, embrace the journey, learn from each experience, and most importantly, enjoy the fruits of your labor.
Stay tuned for more dessert recipes and tips that will inspire your next culinary creation. Happy baking!